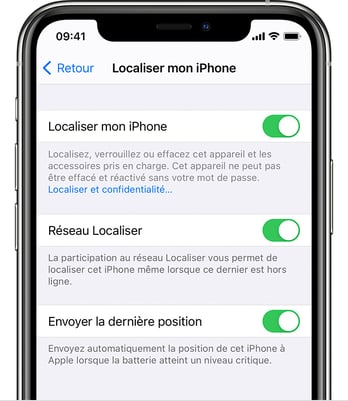
When you buy a second-hand iPhone, plan to resell it, or open a support case with the after-sales service, it's essential to disable the Find My iPhone feature on the device to give it a second life. Whatever your situation, this step is mandatory to avoid any potential lock.
Important: don’t forget to back up your data before removing your iCloud account from the device. You’ll find instructions on how to do it here.
Are you a refurbishment professional or an individual looking to quickly disable iCloud on a second-hand iPhone? We’ll show you how in just 2 minutes, with or without the iPhone in hand. ⏱
Why is it important to disable iCloud before reselling an iPhone?
Disabling iCloud before refurbishing an iPhone is a crucial step to avoid issues related to the Find My iPhone feature. If iCloud isn't deactivated, the potential buyer will be blocked by the iCloud activation lock, preventing them from fully using the device.
This step is also essential to ensure your personal data is protected and that the device can be properly reset for a new user.
In this way, disabling iCloud is part of a broader value chain that enables the effective management of a device’s second life.
1. Disable iCloud if you have the device in your possession ✅
⚠️ Before starting the deactivation process, make sure you are connected to a Wi-Fi network or have mobile data enabled.
On the device, proceed as follows depending on your iOS version:
iOS 13 or later:
- Go to Settings,
- Tap on [your name],
- Tap Find My,
- Turn off Find My [device],
- Enter the password associated with your Apple ID,
- Tap Turn Off.
iOS 12 or earlier:
- Go to Settings,
- Tap on [your name],
- Tap iCloud,
- Turn off Find My [device],
- Enter the password associated with your Apple ID,
- Tap Turn Off.
You can find Apple’s official instructions for other devices here.

2. Disable iCloud remotely if you no longer have the device ❌
If you no longer have the device, you can disable the Find My iPhone feature remotely via iCloud.com from a computer.
⚠️ Before starting the remote deactivation process, make sure you are logged into your iCloud account via an iPhone that you still have in your possession. This device will allow you to receive verification codes to proceed with the steps described below.
Here is the procedure to follow:
- Go to iCloud.com and sign in with your Apple ID,
- Enter the verification code sent to the iPhone in your possession,
- Click on the small dots in the top right corner, then on Find My. A All Devices section will then appear on the screen.
- Select the device you want to erase by clicking on it (if you don't see it in the All Devices list, it means you have already removed it),
- Click on Erase and then on Next to confirm your choice,
- You must enter your iCloud password, then enter the verification code sent to the iPhone in your possession.
ℹ️ If the iPhone in your possession no longer starts, click on Can't get to your devices? and follow the steps.


